The MyHeritage Wiki project is a collaborative encyclopedia for family history and DNA. Articles can be created, edited, and translated by members of the MyHeritage Wiki contributor community. If you're not part of the community yet, we encourage you to join and share your knowledge with the world! Click here to get started.
In this article, we’ll show you how to create, format, and edit articles on the wiki.
Creating an articleCreating an article
Once you are logged in to your contributor account, you’ll see a toolbar on the right. To create an article, click the “plus” button at the top of the toolbar.

If you don't have a contributor account, you can apply to join the contributor community here.
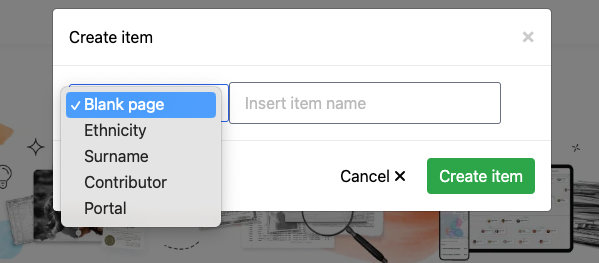
After you click on the plus button, this popup will appear. You can choose a template for your page from the menu on the left:
- Blank page: an article without a specific template
- Ethnicity: an article about a type of ethnicity
- Surname: an article about surnames from a given region or culture
- Contributor and Portal are for administrative use
Then, click on "Create item."

Your page has been created! To get started writing the article, click “Insert paragraph” and begin typing.

Formatting headings & textFormatting headings & text
The toolbarThe toolbar
Headings, sub-headings, and the table of contentsHeadings, sub-headings, and the table of contents
The paragraph format menu allows you to select the format for the paragraph you’re working on.
We recommend inserting headings and sub-headings into your article to help organize the information into smaller, more digestible pieces and allow readers to skim and navigate them more easily. Headings and sub-headings will also automatically create the table of contents that appears on to the right of each article (after you save and refresh the page). Readers can navigate to different sections of the article by clicking on the headings that appear in the table of contents.

To create a section heading, select “Heading.” This will automatically make the text bigger and bolder and create a thin underline beneath the text. Remember: headings should be written in sentence case, just like page titles, with only the first word and proper nouns capitalized.
Once you've entered the title using the Heading format, you can just hit enter and the formatting will automatically switch back to plain text.
If you'd like to divide the section into further subsections, you can use the “Sub-headings” for the titles. Simply click "Paragraph" again and select "Sub-heading 1." This will also make the text bigger and bolder, but smaller than a heading and with no underline. If you'd like to nest more subsections within this subsection, you can select "Sub-heading 2," and so on down the list.

Note that subheadings will appear nested under headings in the table of contents; the reader will need to click the arrow next to the heading to reveal the subheadings nested underneath it.

Adding links & citationsAdding links & citations
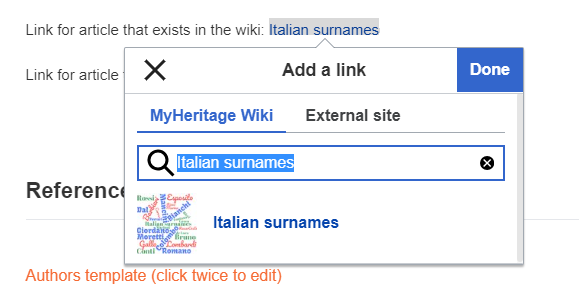
Blue linksBlue links
Red linksRed links
External linksExternal links
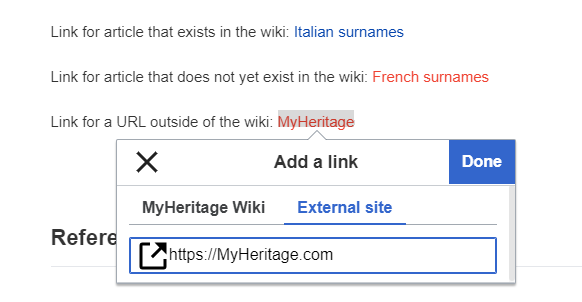
To link to an external site, select the “External site” tab and add the address of the site you’d like to link to. Then click “Done.” External links are indicated with this icon: orange for a MyHeritage website, and blue for everything else. (External links to a MyHeritage website should turn orange after you save the article)
CitationsCitations
Citations are key to keeping the information on the wiki accurate and reliable, and we encourage you to add them to every fact you state in your articles. To add a citation, click “Cite”. You can create a new citation automatically by clicking "Automatic", enter it manually yourself by clicking “Basic,” or re-use an existing citation by clicking “Re-use.”

For the Automatic citation format, just enter the URL (for web addresses), ISBN or DOI (for books) or PMC/PMID for medical works published on the United States National Institutes of Health. The page will generate the citation for you.
For a Manual citation, enter your citation after clicking on the "Manual" tab. Be as detailed as you can, including links if available. Then click “Insert.”


To re-use a citation you’ve already used on this page, click the “Cite” button, then “Re-use,” and select the citation from the list.


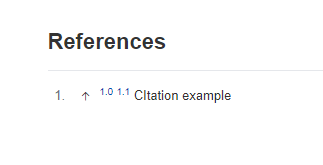
The list of references will be created automatically, and it will appear at the bottom of the page once you’ve saved it. If it gets deleted or removed accidentally, you can always add it back in manually by selecting Insert>Template and searching for the "Footnotes" template.
Creating a listCreating a list
Adding media, templates, and widgetsAdding media, templates, and widgets
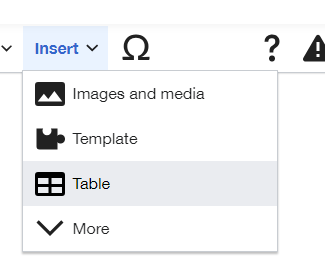
The “insert” menu allows you to add images and media, templates, tables, and more.

MediaMedia
Images help illustrate the points made in your article, but they also make the article more pleasant to the eyes and easier to read. Every article should contain at least one image.
You can either add an image from the Wikimedia Commons database, or upload your own image.

To look for an image from Wikimedia Commons, enter a search term into the search bar.

Click the image you wish to use

The image will open with all its details listed below. Click “Use this image” to proceed.

Here, you can enter a caption and an alternative text, which is a verbal description of the image. We recommend filling out both; it’s okay to copy-paste from one to the other.

Under the “Advanced” tab, you can select a position for the image within the text as well as its type and size. Then click “Insert.”

To upload your own image, click the “Upload” tab after selecting “Images and media” from the “Insert” menu, then click “Upload file” and select the file from your computer, or drag and drop it here.

Please note that any image you upload must either be owned by you or belong to the public domain. If you’re unsure of the image’s copyright status, it’s best not to use it.
Check this box to confirm,

Then click “Upload.”

Here you can enter a name for the image. When you’re ready, click “Save.” Then you can enter a caption and alt text and customize the image settings as shown previously.

When you’re done, click “Insert”, and the image in the text will look like this

TablesTables
To create a table, select “Table” from the “Insert” menu.
A table with a header, four columns, and four rows will be added to the article.

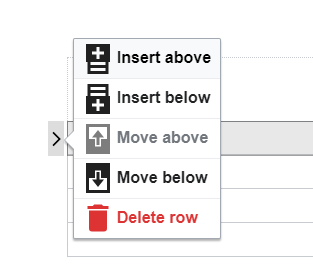
You can add more rows by clicking the arrow on the left and selecting “Insert above” or “Insert below.” You can also move rows up or down by selecting “Move above” or “Move below,” or delete them by selecting “Delete row.”
If you leave a row or column blank, it will disappear once you save the page. Here’s what the table looks like once you’ve saved the page.

Adding authors and contributorsAdding authors and contributors
To add yourself or someone else to the main contributor or “Other contributors” sections, double-click on the orange “Authors template” link at the bottom of the page.

Begin typing the contributor’s user name in the appropriate field and select it from the menu that appears. The system will automatically display your first and last name separated by a period (e.g. John.Smith); edit it to remove the period and replace it with a space. When you’re done, click “Apply changes.”

Once the article is published, the main contributor will appear under the title of the page, while other contributors will appear at the bottom.


ModerationModeration
You can save your article anytime by clicking “Save page” at the top right. This will send any changes you’ve made to our moderators for approval, so the changes you made will not show up until they’ve been approved.
When your article is done, be sure to remove the “draft template” from the top of the page. Simply select it and hit “Delete” on your keyboard.

Tagging your article with categoriesTagging your article with categories
The final step is to tag your completed article with the appropriate categories on the wiki. Click the tag icon on the right-hand toolbar

Then select the category or categories this article fits under. You can select more than one per article.

Note that selecting the subcategory (e.g. United States, Australia, Russia) will automatically nest the article under the main category (e.g. Genealogy research by location).

Here is a brief explanation for each main category:
- Genealogy research by location: Articles relating to specific locations, e.g. "United States Census: Federal Census records," "Australian military records," "Russian immigration," etc.
- Primer on historical records: Articles that explain what different records are in general, but are NOT location-specific, e.g. Newspaper records, Death records, Birth records, etc.
- How-to guides: A broader category for practical guides to researching genealogy and analyzing DNA results, e.g. How to research in an archive, How to get started with genealogy research, How to understand DNA matches, etc.
- Naming traditions: Articles relating to names, including given names, surnames, patronymics, etc. from different locations and cultures. Note that at present, we do not have articles on specific surnames (e.g. Elboym), but rather articles about surnames in a given culture (e.g. Ashkenazi Jewish surnames.)
- Genetic origins: Articles relating to DNA and ethnicity, e.g. DNA segment, Centimorgans, Italian ethnicity, etc.

